Tuesday 26 January 2016

Hello Castella!

My husband and I went to New Malden last Saturday, to check out the little Korean town in London.  (which I will write a bit more later).  We went to a Korean supermarket (it was huge!) and saw some Castella cakes (蜂蜜蛋糕) by the till - it looks so fluffy and suddenly my inspiration came - that's what on the baking itinerary for the weekend!

After browsing a few recipes online, I decided to go after Just One Cook Book's recipe - very detailed explained and the reviews were great.


The first cake was a little too sweet, but is super moist and soft.


The first batch was done on Saturday night, in the 'original' honey flavour.  But after my husband and  I tasted it, we think we might need to cut a bit on the sugar level.  So the recipe below is the 'updated' version, for the one just came out the fridge Tuesday morning.  And that is a 'Pandan' version.


Pandan Castella Honey Cake (1 pound loaf)

Ingredients

3 large eggs (chilled in room temperature for 24 hours)
90g sugar
100g bread flour
1 tbsp honey (2 tbsp honey if making original flavour)
1 tbsp warm water
2 tbsp Pandan extract (omit it for original flavour)
1 1/2 tbsp coconut milk (omit it for original flavour)

extra honey for glazing:  1 tbsp honey + 1/2 tbsp warm water

First of all, line a 1 pound cake tin with baking paper.  Use melted butter to adhere the all sides.

Line the cake tin with parchment paper

Preheat oven at 160C

Sift the bread flour twice, so it is super smooth with no lumps.  In a small bowl, combine 2 tbsp of honey with 1 tbsp warm water.

In a large bowl, use an electric whisk in medium speed to whisk the eggs until frothy.  Slowly add in the sugar and increase speed to high, keep whisking for about 5 minutes - until the egg batter is thick in texture, pale yellow in colour.  It will be 4 times bigger before it was whisked and leave a ribbon trail when you lift up the whisk.

Egg batter is ready when it looks pale yellow and leaves a ribbon trail when the whisk is up

Add honey and whisk in low speed until just combined.  Then whisk in pandan extract and coconut milk also in low speed.  
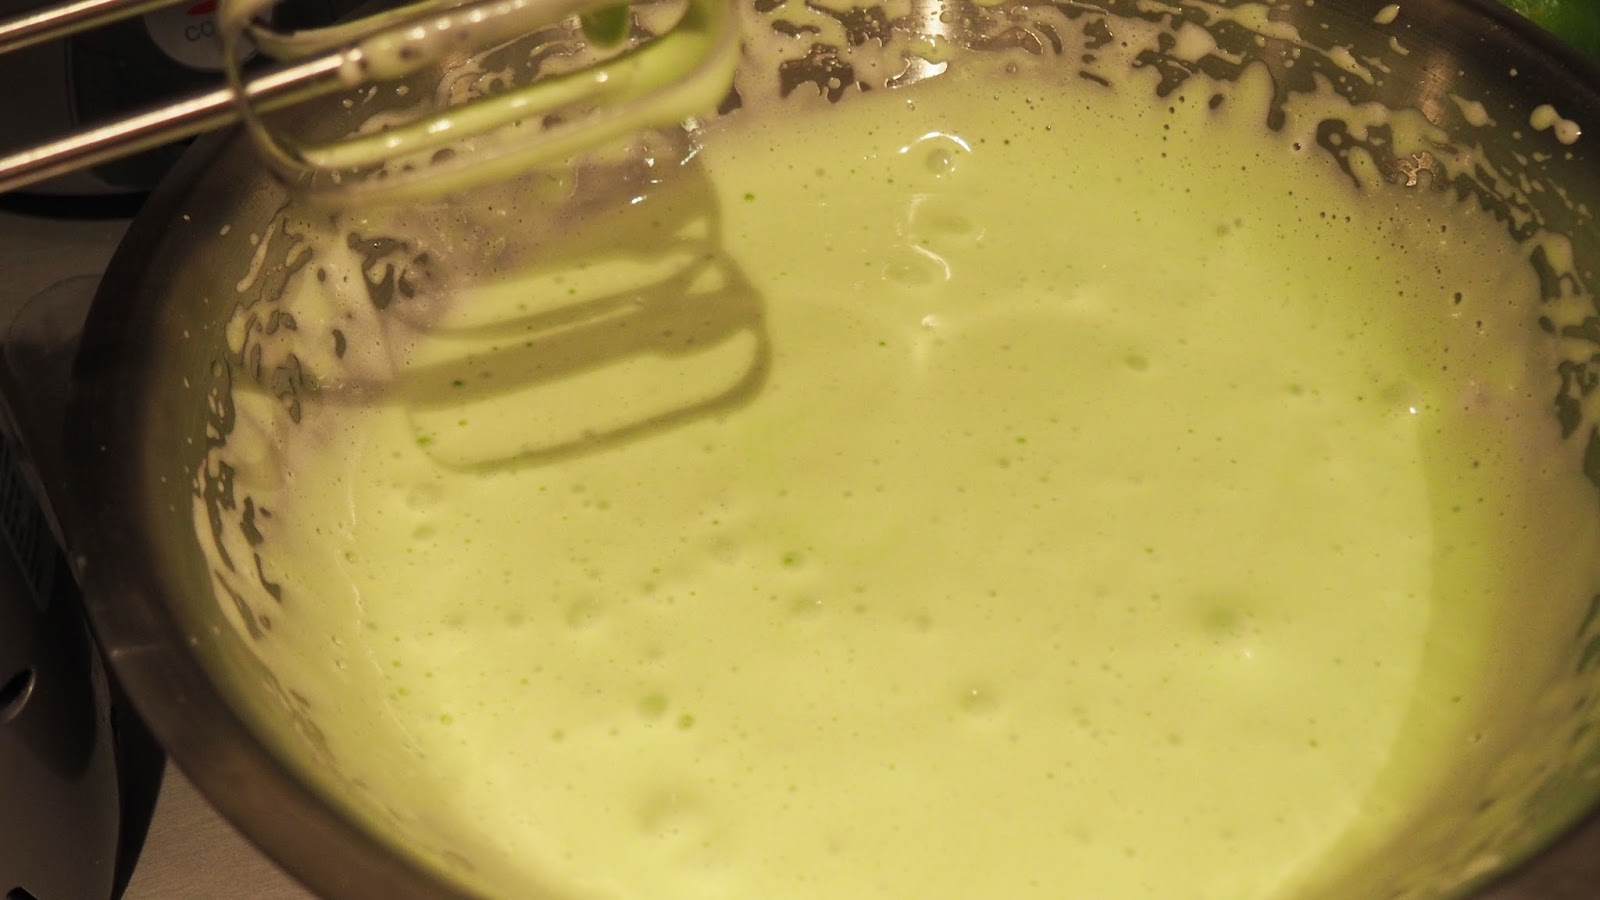
Whisk in honey, pandan and coconut milk - just until combined

In 3 addition, add in the bread flour, each whisk for 15 seconds in low speed.

Now pour the batter into the lined tin, run a stick through the batter to lead out any large air bubbles.  After that, jingle the tin against the counter, this will bring out more air bubbles from the batter and leave a very smooth texture for the cake.

2 steps to bring out air bubbles - run a stick along, then jingle it against the counter

Bake for 40 mins until it is fully set, and it should have a bouncy, fluffy texture when you touch it.

Remove from the oven, and spread on top with the honey glazing.  Then place a large piece of cling film on the counter, remove the cake and turn it upside down onto the cling film.

Wrap it tightly and put it in the fridge immediately to retain the moisture inside the cake.   It is ready to be served after sitting in the fridge over night (upside down!).

Turn it upside down and wrap with cling film.  


I had it this morning for breakfast, is so good to pair with fresh coffee!

Thursday 21 January 2016

Curry Night

Into 2nd week of our vegetarian challenge, my husband felt a bit defeated by the idea of meat-free diet.  To provoke his taste buds and encourage both of us to carry on, I prepared curry for the night. Yes, curry - but no meat, all vegetables!


Mix Vegetable Curry with Fried Rice (Serves 4)


Ingredients


Fried rice:
3-4 bowls of rice (that's about 2 cups of rice, cook the night before and keep in fridge)
80g baby spinach 
1 spring onion, chopped
2 tbsp vegetable oil
salt & pepper for seasoning

Vegetable:
1 red bell pepper, sliced
50g snap peas
1 cauliflower, chopped
1 brocoli, chopped

Curry sauce:
2 potatoes, chopped
1 carrot, chopped
1 onion, chopped
2 tbsp mild madras curry powder
1 garlic gloves, chopped
1 red chilli
2 tbsp vegetable oil
2 cup vegetable stock
salt and pepper for seasoning

For serving:
2 fried egg, sunny side up

Prepare the fried rice:


In a wok, heat 2 tbsp vegetable oil, pan fry the spinach until halfway cooked, put in rice and spring onion, and stir fry together until steaming hot, season with salt and pepper .  Put in a oven safe pot, set aside.

Prepare the vegetable:

Put cauliflower and brocoli in a pot of boiling water, simmer for 8 minutes and rinse.


Layout all the rinsed and chopped vegetables on top of the fried rice, set aside.

Prepare the curry sauce:


Heat 2 tbsp vegetable in a wok, fry the garlic, red chilli until they are fragrant, put in potato, carrot and onion.  Pour in the 2 cup vegetable stock and chilli powder, stir well.  Cover the wok and reduce to medium heat.  Cook until the potato and carrot are soft.  Taste the sauce and season with salt and pepper accordingly.

Preheat oven to 100C

When the sauce is ready, pour on top of the vegetable + rice in the pot.   Cover and bake for 20 minutes.

Pan fry 2 eggs to be served on top of the dish.


I think the runny egg yolk is part of the magic - when it is mixed with the curry sauce and the fried rice, it is to die for!

Muffins Quartet


And breakfast is served!

Was brainstorming for breakfast ideas for my husbands and his team at work, a lot of them are having their new year resolution:: get fit after all those food fest over Christmas and New Year.  Humm... what could I bake to tempt them to dig in?

Here is the answer:  make the muffins light!  I got this blueberry muffin recipe from inspiredtaste and gave a little twist on the sugar level + add on ingredients.

One flavour to serve is a bit too boring, that's why I made 4 choices for them.

Below is the recipe - feel free to try some other flavours!

Muffins - make 16pcs

Ingredients

200g flour
80g granulated sugar
80g brown sugar
1 tsp salt
4 tsp baking powder
60 ml vegetable oil
2 large egg
160ml semi-skimmed milk

Preheat oven at 200C.

In a large bowl mix well flour, sugar, baking powder and salt by a fork.

Pour vegetable oil into a measuring jug than add in the egg.  Afterwards, pour in the milk until it reaches to 2 cup.  Mix well.

Now make a hole in the flour mixture, and pour in the oil mixture.  Combine carefully with a fork and that makes the basic muffin batter.

Now, separate the batter into 4 medium sized bowls, and add in the different flavours separately.
It should be quite dry and thick in texture, if it is too wet, add a bit more flour and more milk if too dry.

Below is the variations of the 4 flavours I made:

Very Berry Muffin

2 fresh strawberries, chopped
6 fresh raspberries, chopped
1/4 cup dried blueberries
1 1/2 tbsp raspberry jam
1 1/2 tbsp rolled oat
*On muffin top: small pieces of berries and sprinkle with a handful of white sugar


Seedy Morning

1 tbsp poppy seeds
2 tbsp sunflower seeds
1/2 lemon peel
1 tsp freshly squeezed lemon juice
1 1/2 tbsp rolled oat
*On muffin top:  sprinkle a handful of poppy, sunflower seeds and lemon peel

Cinnamon

1 tbsp Cinnamon powder
1/4 cup dried blueberries
1 tbsp honey
*On muffin top: sift in a handful of cinnamon powder, sprinkle with white sugar and dried blueberries

Oh! Coco!

1/4 dark chocolate chips
2 tbsp cocoa powder
*On muffin top, put small chunks of dark and white chocolate

Add the toppings before putting in the oven!

Pour in the batter in a lined muffin tray, bake for 20 mins.


Grind a little white chocolate on top as a finishing touch.

My husband took the box to work this morning, and told me they were all sold out by 10am!
Not too bad?

Tuesday 19 January 2016

Pretty in pink!

Eating veggie and baking green tea cakes for the past couple of weeks seems a bit too 'green'..?  Let's indulge in a splash of pink!

Inspired by kitchen tigress blog, and Ispanan - I give a little twist on the matcha swiss roll by giving a hint of fresh raspberry and rose water.    You can never go wrong with raspberry and rose!


Here is the recipe, go pretty in PINK!

Raspberry and rose swiss roll  *for a 12cm x 16cm rectangular pan


Ingredients


60g egg yolk
30g caster sugar
40g vegetable oil
30g flour
a pinch of salt
140g egg white (aged 24 hours in room temperature)
1/8 tsp cream of tartar
1 tbsp raspberry jam
pink oil based food colouring

Filling


100g double cream
1 tbsp raspberry jam
1 tbsp icing sugar
1 tsp rose water
25g fresh raspberry

Preheat oven at 200*C

Line a rectangular pan with parchment paper, leaving two sides of the paper a bit longer that hang out from the pan, it will be easier to remove the cake later on.
In a medium bowl, whisk egg yolk with 10g sugar until thick and creamy.  Add oil and whisk until evenly mixed.  Add raspberry jam and mix well.  While whisking, slowly add in the sifted flour with a pinch of salt.

In a separate large bowl, whisk the egg white in medium speed until frothy.  Add cream of tartar and whisk until foamy.  Increase to medium high speed and add in 40g sugar, tbsp by tbsp.  Keep whisking until it reaches peak foam.

Add 1/3 of the egg white into the egg yolk mixture, fold in gently to lighten up a bit the volume of the egg yolk mixture.  After that, pour it in into the remaining egg white and fold in carefully.

Put the mixture into the lined pan, jingle it against the table to loosen the large air bubble from the batch.  Bake for 9 mins in the medium level.  Than add a pan to the bottom level and continue to bake for another 5 minutes - this will prevent burning the base of the cake.

Remove from the oven, immediately drop the pan from 1 feet high for a couple of times to release the moist within the cake.  Take the cake out to cool on a cooling rack.

While the cake is in the rest, we can prepare for the filling.

In a medium bowl, whisk the double cream in high speed until a little thickened, add the jam, rose water and whisk in icing sugar - adjust portion according to taste.  And also add in few drops food colouring according to your liking. The cream is ready when you whisk it until firm.

When it is completely cool, place a piece of parchment paper on the cake and flip the cake over.  Carefully peel off the original parchment paper - this side will be for spreading the filling on.

Generously spread the cream over the cake (the side you removed parchment paper from), lay the raspberries evenly over the cream. Then roll up the cake from the longer side (which means the cake should be placed 16cm side towards yourself and the 12cm side is on both sides).

Serve with a few raspberries and a cup of breakfast tea.


Friday 15 January 2016

Vegetarian week!

If you have been reading my previous posts, it would be easy for you to understand why my husband and I are giving ourselves a vegetarian week (turned out to be 2 weeks in a row).

Meat is tasty, but every once in a while, having vegetarian meals feels like a breath of fresh air.  I don't know if our take on vegetarian meals are healthy enough, but at least our minds felt detoxed!

Let's not put an equal sign between vegetarian food and dull, there are one too many ways to make veggie tastes great - well, I am not a great cook but I do hope sharing my recipes will excite your taste buds.

Here is the 2nd recipe of my 'cook whatever in the fridge' series.


Tofu Steak Pasta (serves 2)


150g pasta of your choice (I used whole wheat fusilli in below)
50g snap peas
1 red pepper, chopped
6 thick slices of tofu (about 100g)
1 avocado, sliced
a handful of pine nut
1 large egg
salt and black pepper for seasoning
2 tbsp olive oil 
pesto sauce (optional)

Bring a pan of water to boil, pour in the fusilli and simmer for 12 mins and season with 1 tbsp salt, drain and drizzle with 1 - 1 1/2 tbsp olive oil, set aside.

In a small pan, heat 1 tbsp olive oil and sprinkle with salt on the tofu and fry both sides until golden brown, set aside.

In a separate pan, toast the pine nuts until they turn slightly brown and fragrant.

Beat the egg and fry it flat on the pan, so it becomes a very thin piece, remove it onto a chopping board, fold it twice and carefully slice it into egg strips. 

For the snap peas, slightly fry them on the pan for 1 min, they taste better when they are crispy.

Place the fusilli in a bowl, add salt and pepper to season, mix well (you may use pesto sauce if preferred), place all the prepared ingredients on top and lastly the egg strips.  There you go, a bowl of yummy tofu steak pasta!


I am a huge fan of tofu, so I really enjoyed biting into the thick slice! yum!


Wednesday 13 January 2016

An Asian touch to the New Year

For people from Asia, I am sure you are very very familiar with the name Budae jjigae, ('Troop Stew').  Which is basically cooking a number of ingredients, like SPAM, SAUSAGES, PORK and VEGGIES in a Korean kim chi soup base.  And towards to the end of the meal, we cook a package of Korean instant noodle with the soup.

I tried it once in Seoul, Korea and is real delicious! Living so far from Asia now made me crave for Asian food, and especially in this freezing weather, it is nice to have something hot cooked in front of you.  Surprisingly, it is easy enough to get what we need from China Town and Japan Centre at Piccadilly.


Ok, so what was in my pot?  Sliced pork, spam, dumplings, Chinese leaf lettuce, cauliflower, assorted mushrooms, tofu and vermicelli.  We made this for a dinner party with my sister-in-law and her boyfriend.  And they totally LOVED it!

Here is the recipe if you would like to give an Asian twist to your next dinner party!


Ingredients - serves 4

1 bottle  Kimchi hot pot sauce 
200g of sliced pork fillet (chop is just fine, is to your liking)
1 can SPAM (or luncheon meat), sliced
50g vermicelli noodles - soak in warm water for 30mins before use
10pcs dumplings
half Chinese leaf lettuce, sliced
half cauliflower 
150g firm tofu, sliced
 200g assorted mushrooms
1 garlic finely chopped
1 onion chopped
1 tbsp vegetable oil
1 tbsp pork bulgogi marinade
1 slice of cheese
1 package of Shin Ramen

Firstly, in a pan, heat 1 tbsp vegetable oil and cook the garlic and onion until golden brown.  Fry the pork with bulgogi marinade until 60-70% cooked.

Pour in the kimchi hot pot sauce - dilute it according to instructions on bottle.  Now carefully put all the ingredients in the pan, lay them out nice and pretty.  Bring the soup to boil and remove from fire. 

Serve the pot in a camping stove, so you can keep the pan cooking while you eat.  Right before you dig in, put a slice of cheese and dig in once it has melt!

Save the best for last

Towards the end of the meal, cook the ramen in the soup!  YUM!

Tuesday 12 January 2016

Green Tea Loaf

Have you ever had cravings for cakes and after you eat it, feels bad not to hit the gym?  Well, this is basically how I feel daily!

This is always this evil telling you to eat and an angel, on the other side, warning 'No!  You have had enough sugar for the day!'.  To strike a balance between the 2, here is this OH THAT'S HEALTHY cake choice for you.  (and of cause no harm going to the gym too after you eat!)


Green tea chiffon loaf cake - with ROLLED OAT!  (for a 20 x 10 x 6cm loaf tin)


Ingredients 

2 large egg yolk
3 large egg white (chilled 24-72 hrs in room temperature)
75 g granulated sugar
1/4 cup vegetable oil
1/3 cup milk
70 g flour, sifted
1/4 tsp salt
1 tsp baking powder
1/4 tsp cream of tartar
1 tbsp green tea powder
1 tbsp honey (optional)
1 tbsp rolled oat (optional)
1 tbsp poppy seeds (optional)
2 tbsp green tea paste (2 tbsp green tea powder + 80cc hot water)

Preheat oven at 170*C

In a small bowl, pour 80cc hot water into 2 tbsp green tea powder to make a thick green tea paste, cover and set aside for later use.

Sift together flour, salt, baking powder and green tea powder, set aside for later use.

In a medium bowl, whisk the egg yolk with half the sugar (37g) until pale in colour, whisk in oil until combined.  Put green paste, the milk and 1 tbsp of honey in the the mixture and whisk until evenly mixed.  


whisk the egg yolk with sugar until creamy in colour and texture
Add 2 tbsp of green tea paste to the egg yolk

Gradually add the sifted dry ingredients into the egg yolk mixture - slowly mix until they are fully incorporated, if the mixture is too dry, you can add another 1 tbsp of milk to add moist to it.  Add in the rolled oat and poppy seat and mix well.

Sift in flour, salt, green tea powder and baking powder

Mix in rolled oat and poppy seeds

The mixture should look moist - if too try, add another tbsp of milk


In a separate large bowl, whisk the egg white until frothy in medium speed.  Add cream of tartar and increase to medium high speed, continue to whisk until it turns opaque.  Now adding the remaining sugar, 1 tbsp by 1 tbsp, whisk until it reach stiff, but NOT DRY.


After the egg white turn frothy, add 1/4 tsp cream of tartar

Whisk until opaque and add in sugar

Whisk until egg white turns stiff and doesn't drop when you turn the bowl upside down

To make it easier to mix the 2 batter together, first fold in 1/3 of the egg white into the green mixture, it will make the green mixture lighter, so it is easier to incorporate the egg white.  After that, pour in the green mixture into the remaining egg white, fold in (remember in just 1 direction) the egg white with the green mixture until evenly mixed.
Put 1/3 of egg white in the green batter will make it easier to mix in later stage

Pour the batter into the cake tin - which DOES NOT NEED to line, you will know why when it come out the oven.  Smash the tin on the table, so the big air bubble will come out from the batter.  Also run a stick across the batter to bring out large air bubble within the batter.

Run a stick through the batter to lead out the large air bubbles

Bake for 25 - 30 mins until the stick is clean after sticking into the cake.

Place the cake upside down on a cooling rack, so that when the moist evaporate from the cake, the cake doesn't drop - that is why we didn't line the cake tin, so it can hold on to the tin while cooling down.


This chiffon loaf is airy and soft - totally no need to jog after enjoying 2 slices and a cup of tea!  After all, it's 4 degrees outside, I am not going to move! 


Lazy Pasta

While waiting for a cake to be ready in the oven, I use the time to dig out some old photos from the past 3 weeks and came across this random lunch I made the other day.

Is one of those days you want to have some warm food but too lazy to go to a supermarket - here we go, to the first of many more recipes for 'cook whatever in the fridge' series.


Simple spaghetti with tomato and snap peas


Ingredients (serves 1)

100g spaghetti 
50g snap peas
1 tomato, chopped
1 small slice of mozzarella cheese
1 garlic, finely chopped
1 tbsp olive oil
2 tbsp pesto sauce
salt and pepper for seasoning

Cook spaghetti in boiling water, add a pinch of salt, simmer for about 8 minutes (or 12 minutes if prefer a softer taste). Drain and set aside.

In a pan, heat 1 tbsp of olive oil, put garlic in and cook until slightly turn colour.  Put the tomato in, pan fry until it turns soft and add in snap pea continue to cook for 2 mins.

Add in spaghetti and stir in pesto sauce, mix well all ingredients, season with salt.  

Once the spaghetti is mixed evenly with the sauce and vegetables, serve on a nice round plate and put sliced mozzarella cheese on top.  Sprinkle a handful of black pepper on top for taste and garnish with basil leave if preferred.

This dish is too simple - only took 15mins max to prepare.

Monday 11 January 2016

Keep calm and eat cup cake!

31st December is not only the last day of the year, but also my husband and my anniversary.   One of the great things about moving to London is that the kitchen is so much bigger than the one I had in Hong Kong.  And it feels so much happier to bake with a proper oven (and one less excuse for cake failure)

I made this little cup cake to celebrate our love growing 1 year older.  Cup cakes are so fun to make, and then there are all the different ideas to create the topping.  This time, I am pairing them with macaron.  We first got together in Paris, that is why I opt for a French touch with our anniversary treat.

The earl grey tea flavour is added by using very strong earl tea and to give it a 'earl grey look', I add the tea from a tea bag to the flour, if you do not have tea bags, you can just grind the tea leave to a very very fine size - you do not want to be eating 'tea leaves'.  As for the amount of sugar, I always reduce it by at least 1/4 cup from the recipes I found online - as long as you are not taking away sugar from making stiff egg white, it should work fine.


Here is the recipe, please enjoy!


Earl Grey Cupcake (to make 6 pcs)

1 cup sifted all purpose flour
a pinch of salt
1/4 tbsp baking powder
1/2 cup sugar
85g unsalted butter, chilled in room temperature, but not melt
1 egg + 1 egg yolk
1/2 cup milk
1 earl grey tea bag
2 tbsp of earl grey tea (put 2 tea bags in 1/2 cup boiling water to make it super strong)


Raspberry butter cream

100g softed unsalted butter (not melt!)
2 cup powdered sugar
1 tbsp milk
1 tbsp raspberry jam
2 drops of pink gel food colouring (optional)

Preheat oven at 176*C

In a large bowl, sift together flour, salt, baking powder and the earl grey tea bag.

In a separate bowl, cream butter with sugar until smooth with a whisk.  After that, beat in the egg slowly - do not add all the egg in at a time, you need to slowly add so that the egg and butter can incorporate evenly.  When the egg and butter are evenly mixed, whisk in 2 tbsp of earl grey tea.

Now, you are ready to sift in the dry ingredient and add the milk.  Do it gradually and whisk after each addition - do not rush!

Fill 6 already lined cupcake tins, about 3/4 full for each cupcake and bake for 20 mins.

When the cakes are in oven, we can start preparing the frosting!

Slowly whisk in sugar to the unsalted butter, when they are fully incorporated and the milk and raspberry jam - it should look smooth and creamy.


The raspberry jam should make the butter cream pinkish, but you may add a few drops of food colouring to bring out more colour.

When the cupcakes are completely cool, you can garnish with the butter cream as your liking.


Macaron (6 pcs)

50g egg white in room temperature (it is good to age the egg in room temperate for up to 72 hours)
30g caster sugar
75g almond meal
80g pure icing sugar
a handful of 'hundreds and thousands' sprinkles

Preheat oven at 160*C

Line a baking tray with baking paper, underneath it, place a paper with 12 x 2.5 cm diameter circles drawn as a guide to pipe macarons.

In a medium bowl, sift together almond meal and icing sugar - throw away the big lumps that could not go through the sieve.

In a large bowl, whisk egg white until frothy in medium speed.   While beating, add caster sugar one tbsp by one tbsp in medium high speed.  Whisk until the egg white is ALMOST peak, it should be stiff and glossy.

When the egg white is done, fold in almond mixture into the egg white, do not over fold - roughly about 50 folds would do.  The batch should leave a ribbon like trail.

While you let the mixture to rest for 10 mins, we can prepare the pipping bag.  Put the pipping bag in a glass and when the resting is done, just spoon the mixture into the pipping bag.

Pipe the macaron on the baking tray with baking paper and sprinkle with the 'hundreds and thousands' sprinkles.  Carefully remove the paper drawn with circles after piping.

Before you can put the macarons in the oven, let them rest again in room temperature - for a cold and dry British day, I let them rested for 45 mins.  Until it is not sticky when you touch it with your finger tip.

Right before putting them in the oven, lower the oven temperature to 140 degrees, and bake for 20 mins - or until you can lift up the macaron easily and not sticky.

When they are completely cool, pipe the butter cream in the centre and assemble the macarons.


Tears in my eyes when I saw the skirting around the base of the macaron!

Umm.. they raised a bit more than expected

Top it up with a little flag made with ribbon tying to a tooth pick